
This week for electronics production.Assignment of this week is make a pcb of fab ISP from already existing design using Roland Modela
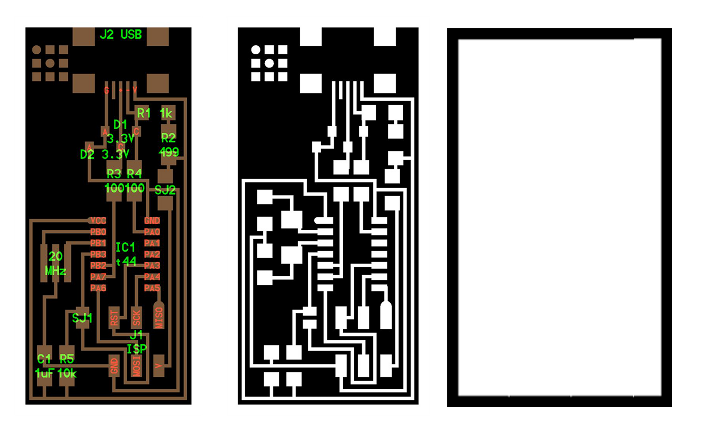
We chose helloISP board to mill. The files downloaded from
http://fab.cba.mit.edu/content/projects/fabisp/fabisp.png
http://fab.cba.mit.edu/content/projects/fabisp/fabispdim.png
We download already design file from http://fab.cba.mit.edu/content/projects/fabisp
In our fab lab we using " Rolland Modella MDX 20 " for mill the pcb. the MDX-20 is an affordable, all-in-one scanning and milling device, perfect for a variety of product design tasks, from model and jewelry making to molds, rapid prototyping, small lot production and package design.
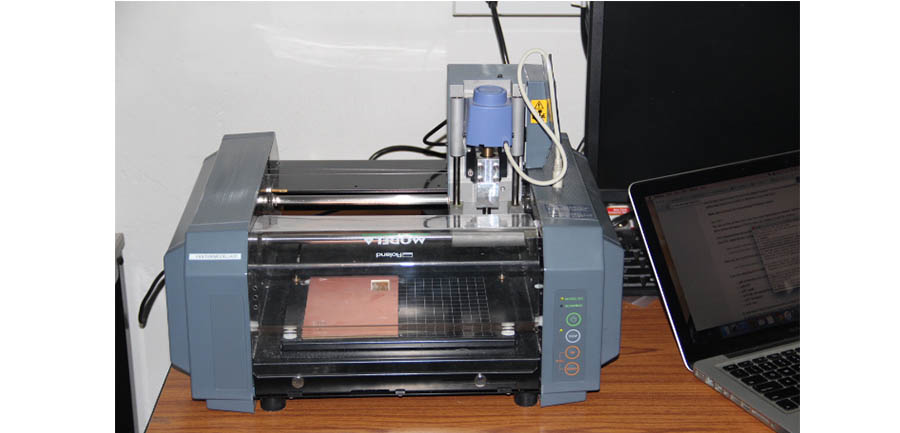
Then start to set up the machine to produce my board, the steps are
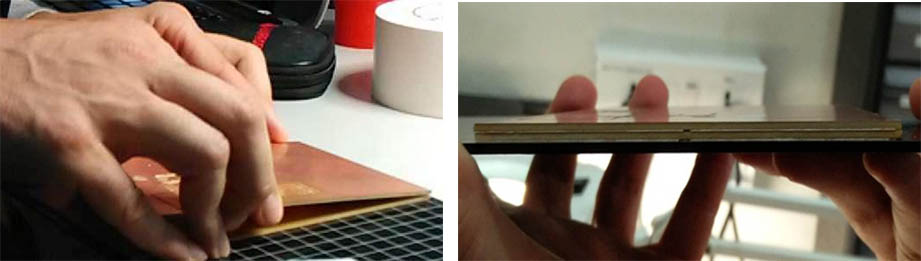
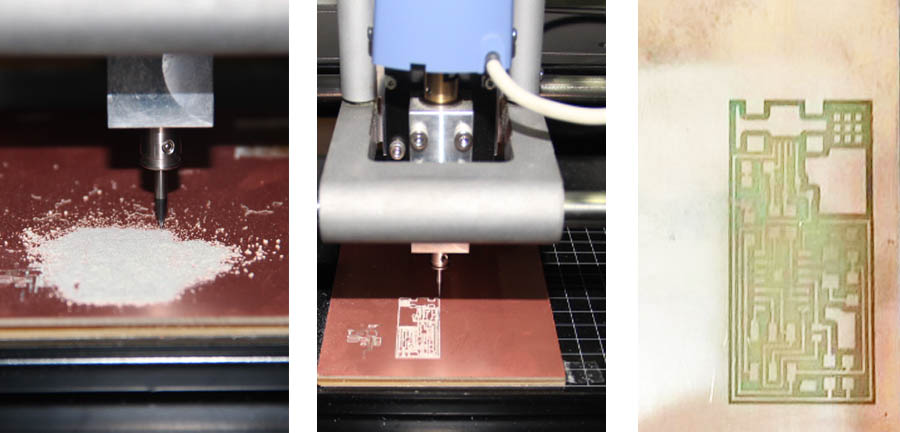
Place a sacrificial layer on the modela bed
First remove the modela bed, using double sided tape place a sacrificial layer of the copper board on the modela bed. For the sacrificial layer copper board place like none-coper side is facing up

Place copper board on top of sacrificial layer
Place the copper board layer we want to mill on the top of this sacrificial layer using double tape. Make sure there is no air bubbles between sacrificial layer and copper board layer we want to mill. Presence of air bubbles is cause to make rise on the copper board which caused some milling problems
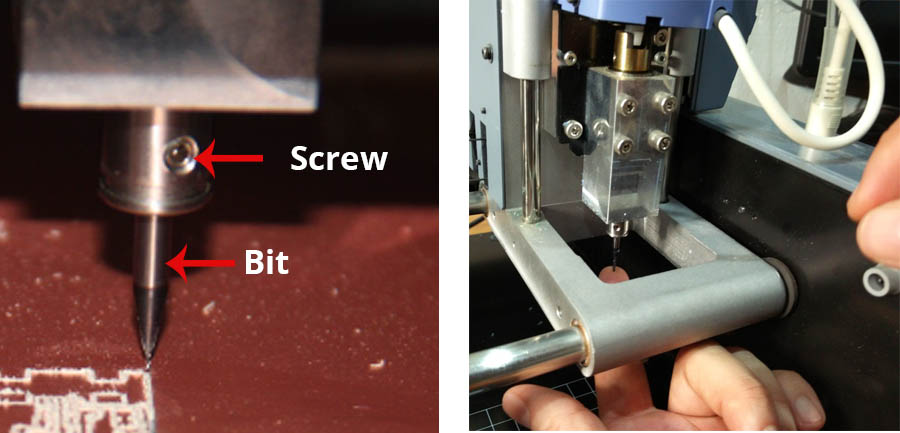
Change the bit to 1/64 for milling the traces
1/64 inch drill bit using For removing the copper parts(to mill the board ). Then correct the height of the bit like just touching the surface of the board.Be carefully handle the bit when removing or fixing the bit. Hold it in a way when removing or adjusting doesn't drop the bit, it causes to break the bit.
Using Allen key loosen the screw on the modela for place or remove the bit
Open Fab Modules
In fab module Select the i/p format '' image(.png) '' and Select the o/p process '' Roland MDX-20 mill(.rml) '' then click '' make_png_rml ''
Now open new window '' make_png_rml ''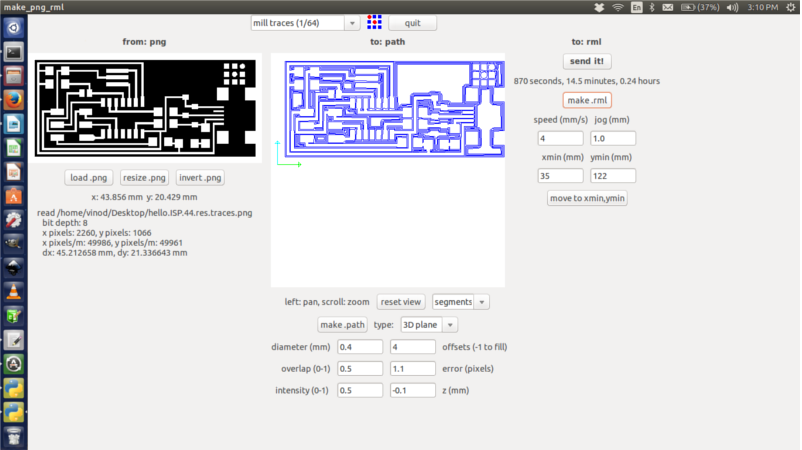
Choose the process as '' mill traces (1/64) ''
Load the .png image
Make path
Using the Fab Module move the bit position to the point where you want the origin to be.Now in the Fab Modules click on make .rml command and then send it to modela
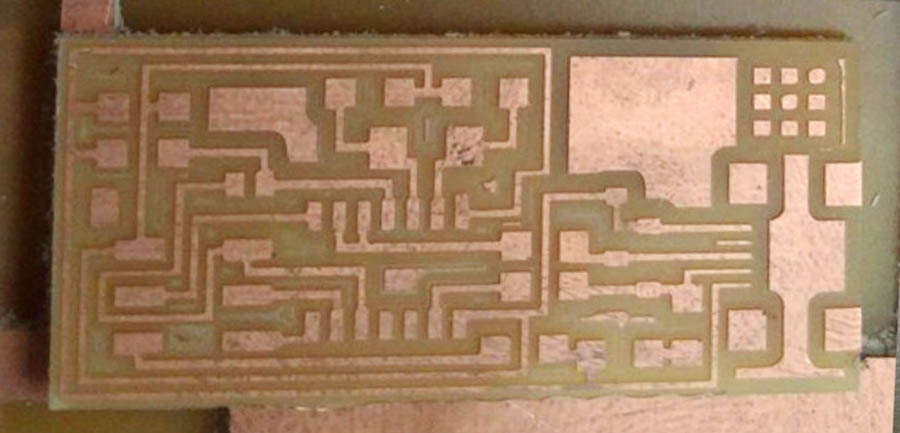
now my pcb is ready ,then I start to soldering the SMD components on it. Starting with the ATTINY microcontroller first.
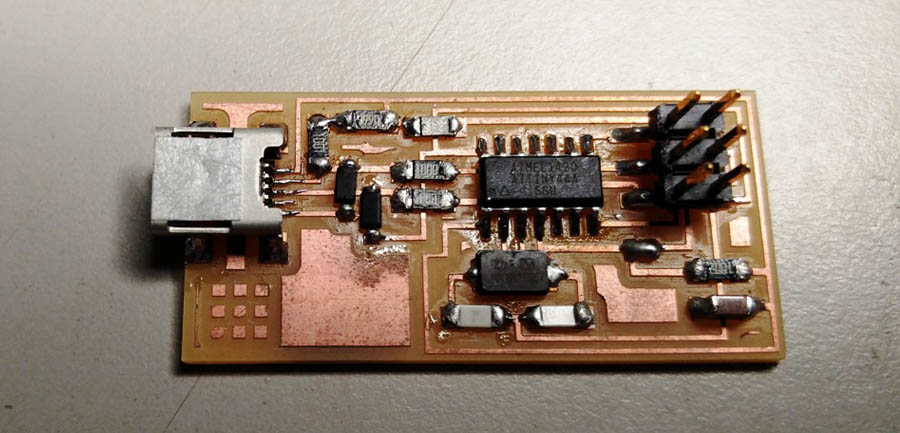
Before using the FabISP, need to program the microcontroller ATtiny44 on it
For programing the ATtiny44, need another (programmed) FabISP or some other in-system programmer (like an AVRISP mkII)
Then close SJ1 (the solder jumper near the microcontroller)
Connect the 6 pin cable of the programmer to FabISP (pin 1 to pin 1)
Provide power to FabISP. Power can provide by connecting FabISP to computer with a USB cable, or, if you're using another FabISP, by closing the SJ2 jumper on both boards
For programming need to install the development tools for AVR microcontrollers ( CrossPack on Mac OS X, WinAVR on Windows, and via the avr-gcc, avr-libc, and avrdude packages on Linux.). I using Ubuntu,
In ubuntu run the following
sudo apt-get install gcc-avr binutils-avr gdb-avr avr-libc avrdude
We need 6.1 version of avrdude
sudo add-apt-repository ppa:pmjdebruijn/avrdude-release
sudo apt-get update
sudo apt-get install avrdude
Add zero ohm resistor on SJ2 and short SJ1
Power the board through USB. It doesn't work without this step. Connect to Atmel-ICE, the notch of the pins pointing towards the inside of the board. Download the firmware and open the firmware fold-er in terminal type the following
make clean
make hex
Now go to the make file generate in folder and open it with text editor. Replace this line in the make file
#AVRDUDE = avrdude -c avrisp2 -P usb -p $(DEVICE) # edit this line for to your programmer(Atmel ICE in our case)
AVRDUDE = avrdude -c atmelice_isp -P usb -p $(DEVICE)
Save the file and close
For the next lines the board had to be connected and live. Continue to enter these lines in folder opened in terminal.
make fuse
make program
Final step is desodler SJ1 jumper shorting. Now the board is ready to be used for programming other boards.